Illustrator为文本添加渐变特效
AI干货教程2016-02-15最终效果图

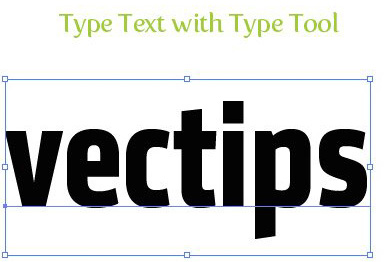
步骤1
用文本工具新建一个文本,选哪个字体都行。我是偏好Klavika Bold Condensed字体啦。
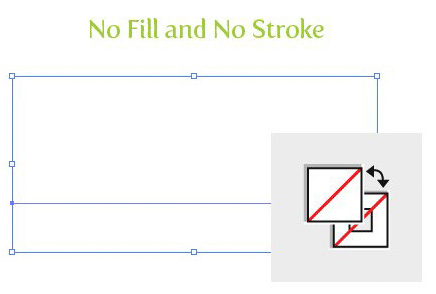
步骤2
把填充和描边全设为无。如果不这样做,在应用渐变色以后,有时候能看到原始的文本色渗在文本的边缘,这显然不是我们想要的。此外,把填充和描边设为无,在AI CS 4中透明渐变看上去效果才会正常。如果起初没有设置填充色为无,原始文本的颜色将会透过透明渐变渗出来而不是显示对象或透明渐变文本的颜色了。
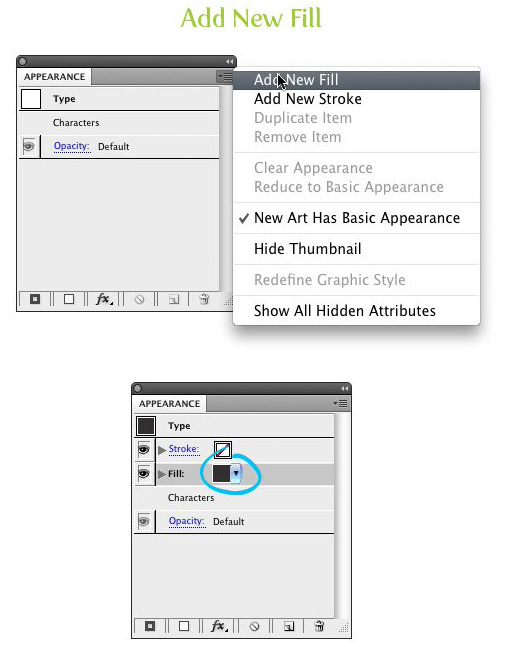
步骤3
用直接选择工具选中文本,打开外观面板中的外观面板菜单(左上方的按钮),然后选择新建填充色。
步骤4
为新建的填充上个渐变色,即可完工!
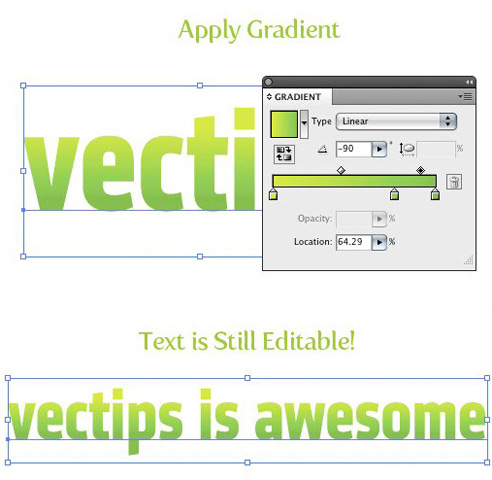
尝试
以下是使用本项技巧为文本添加的透明渐变。