

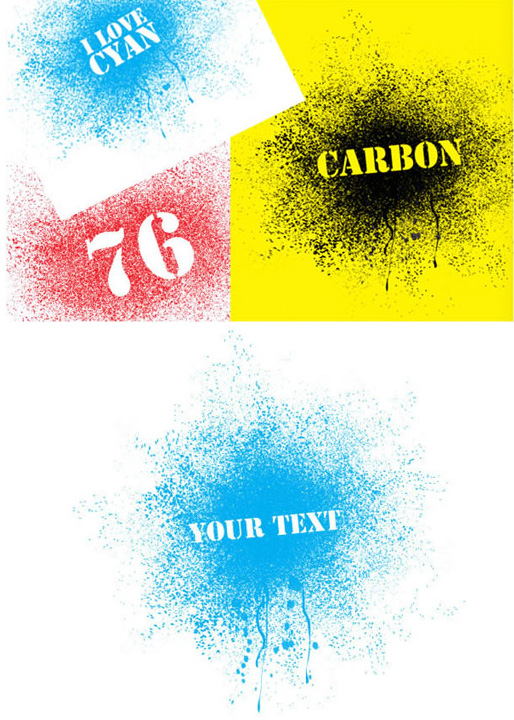
Illustrator为文本添加渐变特效
AI干货教程2016-02-15最终效果图
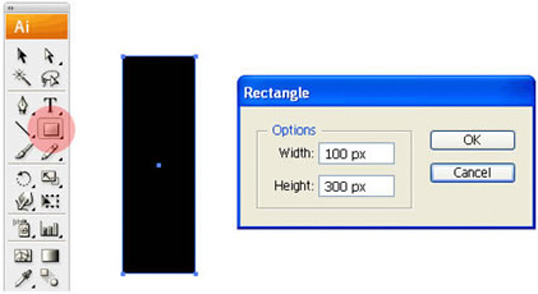
Step 1
创建一个新文档,应用矩形工具(M)画一个100px * 300px 的方框,在里面填充你喜欢的颜色。在形状方面没有特别的要求。这个尺寸只是我应用的,以作参考。
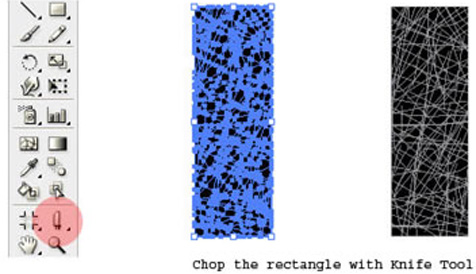
Step 2
在工具面板中,选择小刀工具在矩形上切割,上下左右横着竖着随意的切割。 确保这个矩形上面没有遗留下大的部分。我们的目标是把这个矩形切割成很多细小的小形状。最后的结果看起来就像是下面的图像。
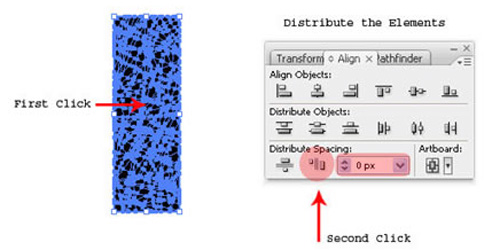
Step 3
现在让我们把这些小块形状散布一下。全选,然后再接近矩形中间的位置单击,然后再对齐面板中点击 “水平散布” 的小图标,设置间距值为 0px。 结果是这些小形状会间隙很大的分布在你的画板中。
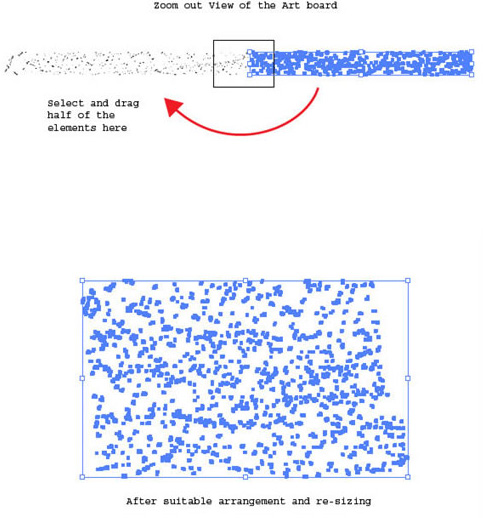
Step 4
放大视图,查看整个的这些小形状。选择其中的一半,拖拽他们到另一半上面。重新把他们排列成一个正方形。 你可能要重新定义选择的这些元素的尺寸,以适合你的画布
Step 5
现在,基本的我们的喷溅元素已经准备好了。选择全部的小形状,单击 对象 > 变形 > 单独变形 (Alt + Shift + Command + D)。输入横向/纵向值为30px. 再循环中输入30度,选择随机。然后点击复制。

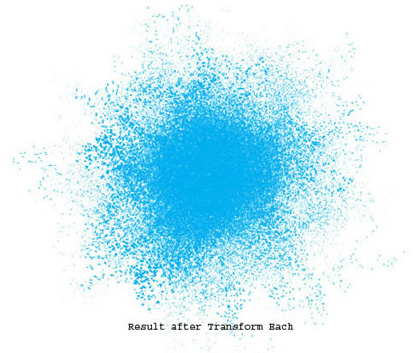
Step 6
现在,不要点击任何地方,按住 Command + D 重复大概 25 到 30 次直到你看到类似于下面的图像效果。 (You may encounter a slowerperformance due to increase in number of anchor nodes. Once the high resolution raster file is exported, we need not worryabout the performance).
Step 7
现在喷溅效果已经完成了。下一步,我们要添加一些流下来的墨水。用铅笔工具(N) 画一些流下来的墨水的大概形状。用很喷溅形状同样的颜色填充。
